Hi folks,
Elaine here with the latest post here on the Quixotic Inspirations blog.
It's starting to get a little chilly here, with October almost upon us. October happens to be one of my favourite months of the year, I love Autumn and am also rather fond of Halloween.
With lots of
Halloween themed stash in stock, it seemed like an ideal time to round up the Quixotic Paperie Design Team and Friends to share some crafty inspiration for this fun holiday. So, starting today, we have a week of Halloween makes for you!
FOLLOW US!
If you haven't already done so, I recommend adding yourself as a follower, subscribing in a reader or subscribing via email so you don't miss any of the DT inspiration that gets posted here on a regular basis. You can do all this over in the sidebar.
GIVEAWAY INFO!
At the end of this post there will be an Inlinkz list for you to submit your name to be in our Halloween prize giveaway. We will be giving away a spooky THIRTEEN small prize packages
(the items pictured below are included in the general prize pot, but please note, the winners will receive one or two items chosen by me, not everything in the picture). All you have to do is enter your name and details in the Inlinkz form at the bottom of this post - please only submit your name ONCE. You do not need to have a blog to enter.
Winners will be drawn at random on Monday 1st October 2012 and announced here on the blog.
SPOOKTACULAR DAY 1
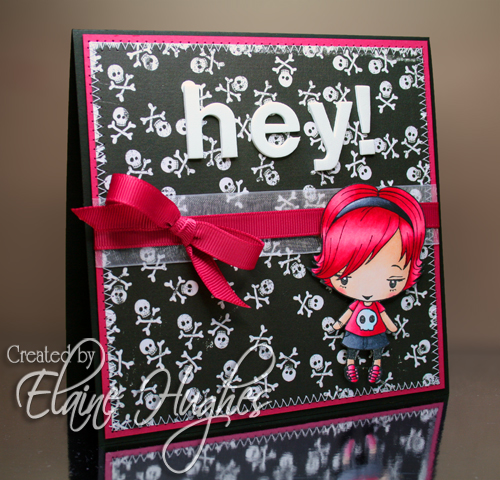
Today I've got a fun little card to share, featuring one of the adorable characters from the
Kraftin' Kimmie Stamps "Too Cute To Spook" sets.
My tastes are fairly wide ranging, and while I love darker and creepier images just as much, I am definitely a fan of "too cute to spook" images! These
Kraftin' Kimmie Stamps cuties are perfect either for makes aimed at children or at big kids like me.
I also used one of the
Kraftin' Kimmie Stamps - Halloween Trinkets stamps. These are perfect for creating clean and simple cards without an image, embellishing treat boxes/bags and of course as shown here, for embellishing cards. The stamps fit nicely in punched or die cut circles (I used Spellbinders Nestabilities to cut around mine).
The designer paper is from an older Echo Park paper pack, but there are some awesome newer Halloween themed paper packs and pads in stock currently available in the
Paper & Cardstock section at Quixotic Paperie. Check out
Graphic45 Happy Haunting,
Echo Park Chillingsworth Manor (
also in 6x6),
Carta Bella All Hallow's Eve (
also in 6x6), and
My Mind's Eye Lost & Found Halloween. You will also find one of my favourites from last year -
Echo Park Apothecary 12x12 kit with 20% off!
I also used a couple of
MFT Die-Namics dies:
Stacking Stars and
Solid Bracket Border.
And because I couldn't resist, a card I blogged last month using another of the stamps from one of the
Kraftin' Kimmie Stamps "Too Cute To Spook" stamp sets.
Spooky cute! I'll leave you now, with the promise that one of the other team members will be along tomorrow with something fantastic to share.
DON'T FORGET - add your name to the Inlinkz list below to enter the prize giveaway!
************************************************