Showing posts with label Memory Box. Show all posts

Monday, 26 March 2012

Kraftin Kimmi "Rose"

Morning peeps long time since I popped on to share a card with you, so without further ado, let me correct that by sharing the devine "Rose" with you.
She is by Kraftin Kimmi and is a dream to colour :-).

I've also used the gorgeous new corner die from Memorybox, this one is called Madera Corner.
I've coloured "Rose" with a combo of ShinHan and Copic markers, the poor lass looks a tad on the pasty side in the photo but in true light she isn't really this pale..:-).
Well thats about it for today from Have a great week & happy crafting everyone :-).


Thursday, 15 December 2011

Nativity scene

Hi everyone!  It's Mary J here with my last card for Quixotic Inspiration this year as Quixotic Paperie is closed for the Christmas period from midnight tonight - so you still have time to place an order for dispatch on 16 December - get there quick!

So of course I had to make a Christmas card because I still have a few more to make for this year - and there's me thinking I was organised for it!!


This little cutie is called Reason for the Season by Elisabeth Bell for SCACD.  I matched her up with Memory Box papers (Elaine is out of this one now but the others are just as gorgeous!) and that gorgeous Holly Vine border die cut by Memory Box and Marianne D Creatable Snowflake dies, finished off with 4mm flat backed pearls

Well, that is it from me this year - I'll see you back here in 2012 with more Quixotic Paperie gorgossity!

Merry Christmas and  a Happy New Year!

Thursday, 24 November 2011

Merry Elf

Happy Thursday everyone!  It's been a loooooong week - thank goodness (and I really mean it this week!) it's Friday tomorrow!  Anyhoo, Mary J here with a funky Christmas card using another one of those wonderful elves from the Make It Crafty Elf Collection...


I used Bazzill Basics Smoothie Kraft cardstock with Echo Park papers and stickers from the Everybody Loves Christmas kit collection.  You can't see it very well (but it looks fab in real life!) but I my Sew Easy Tool with the Cross Piercer Head.  For embellishing I used that gorgeous Memory Box Frosty Border die again.  It's out of stock as I write this, but don't worry Elaine is getting more stock in!  Just email her here and she'll put one by for you (she's nice like that!). 

Right, I gotta go to bed now (writing this on Wednesday night, scheduled for Thursday morning!) as I have another LOOOONG day ahead of me!  Catch ya later!

Thursday, 17 November 2011

Have a Rocky Christmas!

Happy Thursday everyone!  Mary J here with a sweet Christmas card using those gorgeous Quixotic Paperie goodies!  So here it is using the super dinky Rocky from the Make It Crafty Elf Collection...


Oh, he is way toooooo dinky, don't ya think?!  I am going to send this to my young nephew - he's still young enough to like cute!  Anyhoo, I wanted to keep it quite fresh and used Echo Park papers and stickers from the Everybody Loves Christmas kit collection.  For embellishing I used a snowflake from the Marianne D Creatables Swedish Ice Star set with teeny tiny buttons tied with Divine Twine in Cherry Red.  And do you love that snowflake border?!  I do!  It's the new Memory Box Frosty Border die - it's totally gorgeous!

I also used the new Quixotic Inspirations sketch which our lovely Kim Dellow designed...


Play along and you could be in for a chance to win a £15 prize to use at Quixotic Paperie! Or have the privileged to be highlighted as one of our fave Top 3!  Go to this post here to find all the deets.


Monday, 14 November 2011

Look Mom no colouring!!

Morning crafters t'is me Sheila popping by to share my latest DT creation with you, this time I thought I'd make a clean and simple Christmas card showcasing one of the new dies from Memorybox that just arrived in store.

I used the goregous Winterland Tree die, the text stamp is by Whimsy stamps.
thats about all there is to this simple Christmas card of mine, I hope everyone has a fantastic week.
Thanks for taking a look and happy crafting everyone :-).

Monday, 3 October 2011

Merry Christmas

Hi T'is me again Sheila thought I'd share my Christmas card with you :-).

On this little cutie I've used a small stamp from Stempelglede's grunge collection
around the edge of my image, the designer papers are from Memory box Brioche 6x6, and then to had a flourish I've used some Make it Crafty snowflake chippies.
Have a fantastic day and happy crafting everyone :-)


Thursday, 26 May 2011

Gathering love again

Hello, Mary J here to share with you my current faves over at Quixotic Paperie!  Did you see the SCACD blog hop last Friday showcasing the new Natural Beauty Collection release by Carmen Medlin?  Wow, every single one really is beautiful!  I made a rather hot card for the hop (see here) and I wanted to try a more muted one...


I don't normally do shabby chic/vintage but I'm really enjoying experimenting with this style!  This is Gathering Love and Elaine has a special offer ending 27 May - if you buy four or more from this new collection, she will throw in a free stamp!  She will even throw in a free stamp if you buy the full set at the current special price of £29.99 (that's 25% off if you buy all the stamps individually!).

So I matched up this beautify with gorgeous papers from the paper pack Pixie by Memory Box and the creamy rich lace by Alencon lace by Prima.  I did the stitching using the Zig Zag piercer head with my Sew Easy Tool.

I also used the lasercut chipboard by Make It Crafty -  I can't believe the level of detail of this chipboard!  I first gave the chipboard a rough cover of gesso, then dabbed Tim Holtz Distress Stain in Antique Linen over it and lastly rubbed on Viva Decor Glitter Liner in Gold with my finger.  I finished them off with 4mm iridescent pearls in Hyacinth Lilac - here's a close up...


I likey this style!  I'm going to be doing more of this in the future!  That's it from me today - thanks for visiting!

Sunday, 27 March 2011

Guest Designer - Vanja

The lovely Vanja has posted her final card as a guest designer for us, and it is absolutely beautiful.


Thank you for being such a fantastic guest, Vanja!

If you're not familiar with Vanja's blog - Vanja's Crafty Den - make sure you pop over and check it out.  Vanja is on the Whimsy Stamps Design Team, and you can of course find Whimsy Stamps here in the UK at Quixotic Paperie!

PS.  It seems I neglected to post the picture of Vanja's earlier card featuring an adorable Belles n' Whistles image!  So here it is! 


Thursday, 24 February 2011

Hints and tips for the Sew Easy Tool

It's Thursday which means it's Mary J here with my creation using all those lovely goodies at Quixotic PaperieToday I am going to give you my hints and tips for getting the most out of the Sew Easy ToolThere are a few videos out there demonstrating the tool (see the CHA WRMK demo here) but I'm going to give you my experience of it and some practical tips on how to get the most out of it.  I have had my Sew Easy Tool now for a few months and I must say - I love it!  And why is that you ask?

1. I don't have to get my sewing machine out (which is broken anyway!)
2. It saves me a lot of time from piercing the holes plus I am not very good at piercing holes in a straight or even line!
3. Lots of variety - each piercing head (there are 7 and more to come!) has at least 3 different styles of stitching so this takes out the brain work of where to make your holes. Plus it has encouraged me to try new styles rather than do my usual straight lines of back stitching!

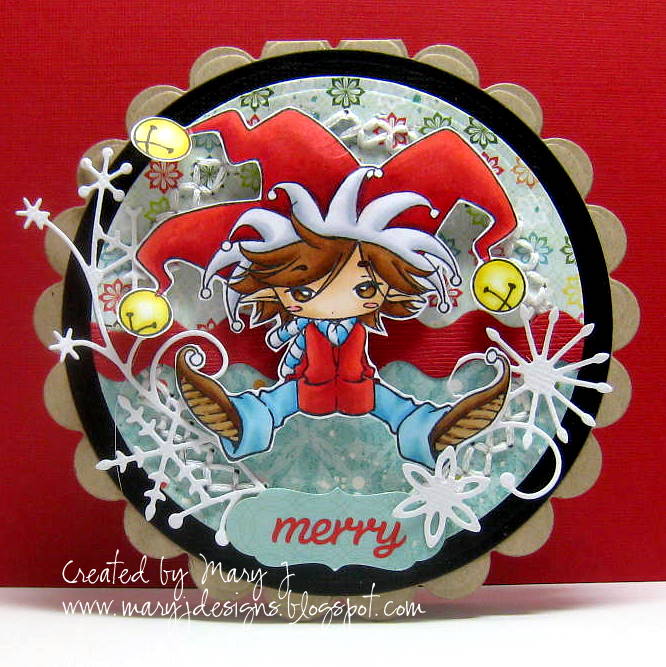
So this is the card I made for my Quixotic Paperie post today where I've used the tool... 


I have used Miss Anya from The Greeting Farm's I Heart Sweaters stamp set with the ever versatile Memory Box Pixie paper pack.  This reminds me of our Springs in the UK - fresh but it can still be little chilly! 

So first some basics for getting the most of your Sew Easy Tool...
  • Paper / cardstock.  The guidance states to use "paper or light card". The tool is made of plastic (hence it's great price!) so it will struggle to pierce through thicker cardstock.  However, with practice (and patience!) I have managed to easily use the the tool with Bazzill Basics cardstock by using a firm and steady technique which I describe below. 
  • Piercing mat. Not any mat will do!  You need to have a firm yet soft base like foam for the tool to pierce the holes through easily. If you don't, then the holes won't pierce through or, if the mat is too hard, the paper may also crumple up because it pushes the paper along rather than having the "give" for the tool to be pushed along. The Sew Easy Piercing Mat is obviously ideal but I have also tried it with a soft mouse mat and it worked well with this too.

Okay, so let's use it!  If you watch the CHA WRMK video you will that the lady does it pretty fast and with a flourish! Well I tried her style when I first got my tool and the paper just crumpled up and no holes were pierced!  I now have two techniques to overcome this.

1. Keep the edge of the head you are using parallel to the paper with your finger pressing directly down, as shown in the picture below. If it's not parallel, the pressure will not be even and the edge of the head will either crumple or cut the paper (or both!).

2. If you are using a thicker card, push the tool along steadily and firmly.  Even though I've used the tool several times now, it won't pierce the holes if I go too fast, but it will still make the indentations so you can at least use a pokey tool to pierce the holes.


3. When pushing the tool down, I find it best to push downwards from the elbow rather than just my finger - I find this doesn't put undue pressure on the paper/cardstock and minimises the paper/cardstock from crumpling/shifting.

4. Before you start to push the tool along, position the tool where you want to begin, then with your finger on top of the head where the finger guide is, push firmly down into the paper/cardstock so it makes its first pierce.  From then, steadily and firmly push the tool along, keeping it aligned. When the cardstock is thicker, I find that some holes aren't always made - I don't worry about this and keep on until I get to the end.  To finish off, I use my pokey tool to make any missing holes. 


Then lastly, but not least, I then do my stitching using my needle and floss.  I usually do this while watching something on the TV - I like to multi task!  Here it is all stitched up before I put the card elements together...


Okay, that's it from me - thanks for your patience and I hope you found this useful!  If you have any of your own techniques or useful tips, please share in the comments to this post!

Sunday, 20 February 2011

Thursday, 17 February 2011

Latest Arrivals!

Just a quick post to let you know about the latest arrivals at Quixotic Paperie!

Two stunning new 6x6 paper packs from Memory Box (a personal favourite) - Brioche and Minuet


The latest Stampavie release from Mo Manning.  LOVE the images they have released, pure Mo brilliance!


PLUS two new 12x12 collection kits from the amazing Echo Park - For The Record and Springtime.  GORGEOUS!


The latest Kraftin' Kimmie Stamps are due to arrive tomorrow.  I have a limited number left on preorder, so if you want them ASAP make sure you get your order in!

As always, you can check out the latest arrivals under New Products at http://www.quixoticpaperie.co.uk/

LinkWithin

Related Posts Plugin for WordPress, Blogger...